7 Tips to Choose the Best 3 Point Hitch Sprayer?

Choosing the right 3 point hitch sprayer can change how efficiently a farm handles routine spraying. The wrong model may leave streaks, waste valuable product, or demand constant repairs. The right one should match your tractor, crop layout, field size, and daily workload.

Dr. Andrew Landers, a respected agricultural application specialist, emphasizes, “Good spraying is about placing the right amount in the right place at the right time.” That principle guides this practical overview of seven selection tips. We will examine tank capacity, hitch compatibility, boom width, pump performance, nozzle options, filtration, and operator safety. Small details matter. A poorly matched PTO shaft can create vibration. A weak pump may produce uneven pressure at the outer nozzles. A narrow boom can turn large fields into slow, tiring work.

Real farms rarely offer perfect conditions. Sloping ground, muddy headlands, changing weather, and limited storage space can expose weaknesses quickly. I have also seen specifications look impressive while the frame felt too light for regular use. That is worth questioning. Bigger is not always better.

This guide focuses on measurable decisions rather than attractive product claims. It also recognizes that every operation has different priorities. A vineyard may need compact control, while a broad-acre farm may value coverage and speed. Before choosing a 3 point hitch sprayer, consider how the machine will perform after months of use, not only how it appears at purchase.
7 Tips to Choose the Best 3 Point Hitch Sprayer?

Define Your Spraying Needs and Property Requirements

Before choosing a three-point hitch sprayer, define what you actually spray. A small orchard, pasture, and vegetable plot need different coverage patterns. Measure the property, including slopes, narrow gates, and soft ground. Draw these details on paper. It takes ten minutes. Note the crop height and row spacing. A wide boom may look efficient, yet it can damage plants or miss tight corners. In field inspections, access problems often matter more than tank size.

Estimate the area treated per session, not the total land you own. Then record available water, filling points, and storage conditions. A 200-liter tank may suit short jobs, while larger capacity can strain a compact tractor. Check the tractor’s hitch rating, lifting ability, PTO requirements, and hydraulic compatibility. Do not rely on appearance alone. Ask for a clear flow-rate chart and test nozzle output with clean water. Uneven spray can leave pale strips in one pass and excessive residue in another. Calibration is boring, but it protects results and resources. Follow product labels and local equipment safety requirements.

Choose nozzle options for your target coverage and wind conditions. A pressure gauge, shutoff control, and accessible filter make adjustments easier. Inspect hose routing before purchase; sharp bends invite leaks and wasted time. I have underestimated cleanup space before. That mistake made winter storage harder. Plan where the sprayer will be rinsed, drained, and protected from freezing. Leave room for repairs. Match the machine to your habits, not an imagined perfect season. If you spray only a few acres, simple controls may be more dependable. Record your first calibration results and revise them after real use. The first setting may be wrong.

7 Tips to Choose the Best 3 Point Hitch Sprayer

Define your spraying needs and property requirements before selecting tank capacity, boom width, and operating coverage.

These planning ranges reflect commonly available three-point hitch sprayer configurations: smaller properties generally suit compact 25–50 gallon tanks, while larger areas may require 100–150 gallon tanks and wider booms. Always confirm tractor lift capacity, application rate, terrain, and local chemical-label requirements before purchase.

Choose the Right Tank Capacity and Hitch Compatibility

Choose tank capacity from your actual spray rate, not the largest tank available. The basic calculation is simple: tank gallons divided by gallons per acre equals theoretical coverage. A 300-gallon tank at 15 gallons per acre covers 20 acres. Leave space for rinsing, slopes, and uneven fields. Field conditions often reduce the usable figure by 10% or more.

Tip: Match the tank to your tractor’s lift capacity.
Tip: Confirm compatibility before delivery.

The Agricultural Engineers Yearbook and ASABE S217.12 describe three-point hitch dimensions, including pin sizes, link spacing, and attachment geometry. Category 1 and Category 2 systems are not interchangeable without proper bushings or approved adapters. Check the tractor manual for lift capacity at the hitch points, not only the rated capacity near the tractor. A full tank becomes extremely heavy. It can also shift weight away from the front axle.

Measure the upper link position, lower-pin width, PTO clearance, and hydraulic connections. ISO 730 provides recognized three-point hitch classifications, but real tractors can still differ in clearance. USDA Agricultural Chemical Use Program reports show application rates vary significantly by crop and treatment. That makes adjustable nozzle flow and accurate calibration essential. ASABE EP367.2 recommends checking actual output rather than trusting dial settings. I would recheck calibration after changing speed or pressure. Small errors become expensive across large fields.

Compare Pump Types, Pressure Ranges, and Application Rates

Tip 1: Match the pump to the liquid and workload. Diaphragm pumps tolerate abrasive mixtures and offer dependable pressure control. Centrifugal pumps provide high flow, but they dislike dry running. Roller pumps suit simpler jobs, although wear can change output. Check the pump’s flow rating against your boom width and travel speed.

Tip 2: Treat pressure as a nozzle setting, not a cure-all. Most field sprayers operate within a moderate pressure range, often around 20–60 psi. Higher pressure can create finer droplets and increase drift risk. Lower pressure may produce uneven coverage. Read the nozzle chart, then select pressure according to the desired droplet size and target surface. Tiny changes matter.

Tip 3: Measure application rate before entering the field. Collect liquid from each nozzle for one minute and compare the volumes. Replace any nozzle varying more than roughly 10% from the average. Calculate gallons per acre using nozzle flow, spacing, and speed. A slower tractor increases the application rate, even when pressure remains unchanged. I once trusted the gauge alone, and the result was inconsistent coverage. That mistake still influences my checks. Recalibrate after changing speed, pressure, or nozzle size. Include a clean-water test, because field residue can distort early readings.

7 Tips to Choose the Best 3 Point Hitch Sprayer? — Compare Pump Types, Pressure Ranges, and Application Rates

Tip What to Compare Common Options Typical Working Range Best Fit Selection Check
1 Match the pump type to the liquid and workload Diaphragm, centrifugal, or roller pump Small 3-point sprayers commonly use pumps of about 8–20 US gal/min (30–76 L/min), depending on boom width and agitation needs. Diaphragm pumps suit abrasive or chemically aggressive mixtures; centrifugal pumps suit high-volume, lower-pressure spraying; roller pumps suit compact PTO-driven systems. Confirm chemical compatibility, self-priming capability, required PTO speed, and whether the pump can supply both the boom and agitation circuit.
2 Choose a useful pressure range Adjustable pressure regulator with pressure gauge Approximately 20–60 psi (1.4–4.1 bar) is common for many field-boom applications; some equipment may be rated higher. Low-to-moderate pressure generally helps reduce drift when the selected nozzle is designed for that range. Check the nozzle manufacturer's pressure range. Do not use pressure alone to set the application rate.
3 Select the target application rate Flow rate, travel speed, nozzle spacing, and spray width Many broadcast field applications fall around 10–20 US gal/acre (94–187 L/ha), but the product label always takes priority. Lower rates can reduce water use; higher rates may improve coverage for dense foliage or certain contact products. Use the basic relationship: application rate depends on nozzle output, nozzle spacing, and forward speed. Calibrate with clean water before spraying.
4 Size the tank for field conditions Tank capacity, tractor lift capacity, and transport stability Compact 3-point sprayers often range from about 50–300 US gal (190–1,135 L), with the upper limit determined by tractor capacity and implement design. Smaller tanks work well for orchards, small fields, and frequent refilling points; larger tanks reduce refill frequency. Calculate the full liquid weight, account for tank movement, and verify the tractor's rated three-point lift capacity at the required lift height.
5 Match boom width to tractor and terrain Folding boom width, boom stability, and nozzle spacing Common 3-point boom widths are approximately 12–30 ft (3.7–9.1 m), although specialized equipment may be narrower or wider. Narrow booms are easier to maneuver around trees and buildings; wider booms cover more area per pass on open, level ground. Ensure the tractor can safely carry the sprayer with the boom folded, and look for breakaway protection and height adjustment.
6 Choose nozzles for coverage and drift control Flat-fan, air-induction, hollow-cone, or adjustable nozzles Nozzle spacing is often 20 in (50 cm) on field booms; common operating pressures may range from about 20–60 psi, depending on nozzle design. Flat-fan nozzles are widely used for broadcast applications; air-induction designs can produce larger, more drift-resistant droplets. Verify nozzle material, spray angle, droplet size, overlap pattern, and compatibility with the required product label.
7 Prioritize calibration, filtration, and serviceability Pressure gauge, suction filter, line strainers, agitation, and drain system A practical setup should allow repeatable pressure control, accessible filters, and easy flushing after each use. Reliable calibration is more important than maximum pump pressure for achieving a consistent application rate. Measure nozzle output periodically, replace worn nozzles, rinse the system thoroughly, and follow all pesticide-label safety requirements.
Important: The ranges shown are general planning values, not operating instructions for a specific chemical. Always follow the product label, local regulations, the sprayer manual, and the nozzle manufacturer's calibration chart.

Evaluate Boom Width, Nozzle Options, and Spray Coverage

7 Tips to Choose the Best 3 Point Hitch Sprayer?

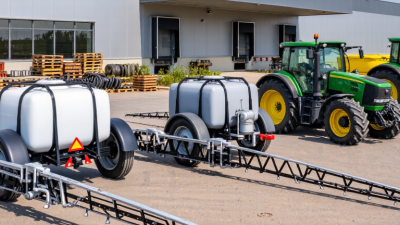
Measure your field entrances before choosing boom width. A wider boom covers more ground, but it may strike trees, fences, or uneven edges. Match the boom to your tractor’s stability and lifting capacity. A 12-foot boom often suits smaller fields and narrow access points. Check whether the boom folds securely during transport. Small details matter.

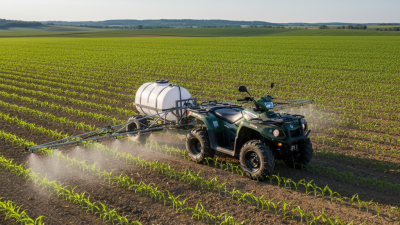
Inspect nozzle options carefully. Flat-fan nozzles can provide even broadcast coverage, while low-drift designs may reduce airborne movement. Choose nozzle spacing that matches the boom and operating pressure. Keep spray height consistent above the crop. A simple pressure gauge helps maintain repeatable output. Do not trust appearance alone. Measure flow from each nozzle with a container and stopwatch.

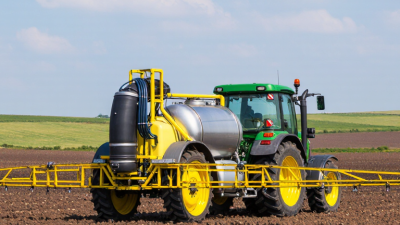
Calculate spray coverage before purchase. Tank size, travel speed, boom width, and application rate must work together. For example, a 200-gallon tank can cover a large area, but only when the pump supplies steady pressure. Flush the system after use and inspect clogged screens regularly. I once assumed a weak spray came from the pump; a blocked filter was the real problem. Recheck your settings in the field, because rough ground changes boom height. Consult the product label and a qualified local agronomist when selecting rates or nozzle patterns.

Check Construction Quality, Maintenance Needs, and Safety Features

Tip: Check the frame, hitch points, and boom supports for thick, even welds. A strong sprayer should not flex when the tank is full.

Tip: Inspect the tank for smooth walls, firm mounting straps, and a drain that opens easily. Sharp internal edges can trap chemical residue and make cleaning unreliable.

Tip: Examine the boom hinges and folding locks. They should move smoothly without excessive play. Test the spray pattern with clean water before field use.

Tip: Choose accessible filters and a pump with simple service points. You should reach them without removing half the machine.

Tip: Check whether hoses, seals, and nozzles are common replacement sizes. Proprietary parts may increase downtime. I have learned that cheap access can become expensive later.

Tip: Look for clear pressure controls, a readable gauge, and a dependable pressure-relief system. These features help protect the operator and the equipment.

Tip: Confirm that shields cover rotating parts and that the hitch connection locks securely. Keep hands away during operation.

Tip: Read the maintenance schedule before buying. If daily rinsing feels difficult, it probably will not happen consistently. That is a weakness worth admitting. Clean water, dry storage, and regular inspections reduce leaks, blocked nozzles, and uneven application. Always follow the equipment manual and local safety requirements.